Wednesday, 26 June 2024

OBDSTAR MT203 CAN Driver/Gateway Simulator Is Coming!

Good news! OBDSTAR MT203 CAN Driver/Gateway Simulator will arrive next month and can accept pre-orders now. It's an automotive electronics maintenance and repair tool to support the dash, audio, gear lever, AC panel, and other test functions. It provides CAN driver and gateway simulation functions for multiple vehicles.

OBDSTAR MT203 is a compact device and a good helper for automotive electronics maintenance engineers!

obdstar-mt203-can-driver-gateway-simulator-is-coming-1

Application

Automotive electronic ECU repair(airbag, dash, BCM, and other modules simulation gateway diagnostic test by BENCH) 

Automotive electronic ECU repair(dash, audio, gear lever, AC panel, and other modules CAN drive test by BENCH)

E-Car components repair(compressor, DCDC, on-board charger, and other modules simulation gateway diagnostic test by BENCH)

Advanced Functions

Using STM32H723 high-performance MCU, fast running speed;

Support standard CAN, low speed(fault-tolerant CAN), CANFD protocols;

Automatic scanning, manual baud rate selection, custom input baud rate, and other modes to simulate different types of gateways;

Integrated design, comes with 120Ʊ resistor switch, easy to operate;

A simple and intuitive menu allows you to master the device operation quickly;

Mini USB upgrade cable directly connected to the PC for one-key upgrade.

Supported Protocol Types/Functions

Gateway Supported Protocols

Standard CAN/Standard CAN

500K/250K

500K/125K

Custom Baud Rate

Standard CAN/CAN FD

500K/5M

500K/2M

Custom Baud Rate

Standard CAN/Tolerant CAN

500K/83.3K

500K/100K

500K/125K

125K/125K

Custom Baud Rate

CAN Driver-Supported Functions

Supports dash, audio gear lever, AC panel, and other test functions for the below models:

AUDI, FORD, PORSCHE, BENZ, JAGUAR, ROLLS-ROYCE, BMW, LAMBORGHINI, VOLKSWAGEN, DODGE, LAND ROVER, VOLVO...

obdstar-mt203-can-driver-gateway-simulator-is-coming-2

www.obd2shop.co.uk


Tuesday, 18 June 2024

OBDSTAR X300 DP PLUS Program 2022 KIA K5 All Keys Lost

Today I will program 2022 KIA K5 all smart keys lost with OBDSTAR X300 DP PLUS by OBD. The new device OBDSTAR X300 Classic G3 can also do this job. Let's see how it's doing.

obdstar-x300-dp-plus-program-2022-kia-k5-all-keys-lost-1

CAR IMMO >> HYUNDAI, KIA, GENESIS >> Latest version >> Manual select Model >> KIA >> EUROPE >> K5(DL3) >> 2020-2021 >> PROXIMITY >> Program Smart Keys

This function is available by connecting the service, please ensure the Internet connection is normal.


After this function is executed, all keys will be erased and re-programmed to use.

Please have all the keys ready if you need to perform this function.

Press "Continue".


Turn off the ignition, then open and close the driver's door once.


Please input the pin code: 667094

*The pin code can be read on Key Master DP PLUS.

obdstar-x300-dp-plus-program-2022-kia-k5-all-keys-lost-2

obdstar-x300-dp-plus-program-2022-kia-k5-all-keys-lost-3

obdstar-x300-dp-plus-program-2022-kia-k5-all-keys-lost-4

obdstar-x300-dp-plus-program-2022-kia-k5-all-keys-lost-5

Press the Enter button, then within 5s, use the top of the proximity key(the end with the indicator) to keep pressing the start/stop button for 5s, and the immobilizer light will flash.

(If the operation fails according to the prompt, please remove the key housing and perform this function again)

Program success.


The number of current keys: 1

Please exit the whole system, and check whether the smart key is programmed successfully or not.

Program complete.


Test the new key, it can normally work.

Done.

obdstar-x300-dp-plus-program-2022-kia-k5-all-keys-lost-6

obdstar-x300-dp-plus-program-2022-kia-k5-all-keys-lost-7

www.obd2shop.co.uk

Thursday, 30 May 2024

OBDSTAR X300 Classic G3 Manual: Screen Recording

This article will guide you on how to use OBDSTAR X300 Classic G3 to record screens.


Procedure:


Step 1. Open the hidden menu at the bottom of the desktop and select [Screen Recording]. Or you can swipe down from the top of any interface to expand the drop-down box, then swipe down again to expand the first column and select [Screen Recording].

obdstar-x300-classic-g3-manual-screen-recording-1

Step 2. After tapping [START] in the pop-up box, a countdown will be displayed in the lower right corner and a beep will sound after three seconds, indicating that recording has started.

obdstar-x300-classic-g3-manual-screen-recording-2

Step 3. When you want to end recording, tap the red icon in the bottom right corner and the hidden menu at the top of the screen will open automatically, tap [Stop Screen Recording] to end recording.

obdstar-x300-classic-g3-manual-screen-recording-3

For more information about OBDSTAR X300 Classic G3 please follow www.obd2shop.co.uk

Monday, 27 May 2024

OBDSTAR X300 Classic G3 Manual: Transfer Files Using USB Flash Drive

This post will guide you on how to transfer files using a USB flash drive on your OBDSTAR X300 Classic G3 Key Programmer.

Procedure:

Step 1. Insert the USB flash drive into the USB port of your device.

Step 2. Expand the hidden menu at the bottom of the desktop and select [ES File Explorer] to open it. In the left menu, select [Local] > [Home]. The block under the Internal Storage block is for USB storage.

obdstar-x300-classic-g3-transfer-files-using-usb-flash-drive-1

Step 3. Open [Internal Storage], select any folder (or open the folder to select files) and hold. An empty circle will appear under each file, and function buttons such as copy, cut, delete, and rename will appear at the bottom right. Select the folder (or file) you want to transfer, the circle under the selected folder will be marked with a checkmark and turn green, then tap [Copy].

obdstar-x300-classic-g3-transfer-files-using-usb-flash-drive-2

Step 4. Go back to the Home tab, then select the storage for the USB you inserted.

obdstar-x300-classic-g3-transfer-files-using-usb-flash-drive-3

Step 5. Open the [Usb Storage] folder and all the folders in the USB drive will be displayed (See example below). Paste the copied folder (or file) to the desired location.

obdstar-x300-classic-g3-transfer-files-using-usb-flash-drive-4

Step 6. After everything is done, just pull out the USB flash drive.

For more information about OBDSTAR X300 Classic G3 please follow www.obd2shop.co.uk

Friday, 10 May 2024

Alfa Romeo Stelvio Instrument ECU Unlock via OBDSTAR X300 Classic G3

This post will guide you on unlocking the used instrument ECU for Alfa Romeo Stelvio using the OBDSTAR X300 Classic G3 key programmer.


The tools we need:

Alfa Romeo Stelvio Instrument

X300 Classic G3

P004 Adapter

Main Cable

P004 ECU Clone Jumper

alfa-romeo-instrument-unlock-via-x300-classic-g3-1

Procedure:

First, we select [ECU Advanced] >> [FIAT/ALFARMEO] >> [FIAT/ALFARMEO V30.04] >> [ALFARMEO] >> [IPC]

alfa-romeo-instrument-unlock-via-x300-classic-g3-2

alfa-romeo-instrument-unlock-via-x300-classic-g3-3

alfa-romeo-instrument-unlock-via-x300-classic-g3-4

alfa-romeo-instrument-unlock-via-x300-classic-g3-5

Click [Guide] in the lower left corner of the X300 Classic G3 tablet, and carefully read the development background and operation methods.

Then click [Back] to return to the previous interface, and select [ECU information] to view the information, we can see that ECU is locked here.

Then we select [ECU Unlock] to unlock.

alfa-romeo-instrument-unlock-via-x300-classic-g3-6

alfa-romeo-instrument-unlock-via-x300-classic-g3-7

alfa-romeo-instrument-unlock-via-x300-classic-g3-8

Information:

This function is available by connecting the server, please ensure the internet connection is normal.


We click "OK" to continue.


The instrument light turns on and the ECU unlocked successfully.

alfa-romeo-instrument-unlock-via-x300-classic-g3-9

alfa-romeo-instrument-unlock-via-x300-classic-g3-10

Video Guides:

www.obd2shop.co.uk

Tuesday, 7 May 2024

How to register and update OBDSTAR X300 Classic G3

This post will guide you on how to register and update your OBDSTAR X300 Classic G3 Programmer.


Connect the power supply, connect to the network.

register-and-update-x300-classic-g3-1

Select [DP] in the lower left corner of the tablet, and select [Personal Center] to enter the user login page.

register-and-update-x300-classic-g3-2

register-and-update-x300-classic-g3-3

Select [Register] to fill in relevant information.

register-and-update-x300-classic-g3-4

register-and-update-x300-classic-g3-5

register-and-update-x300-classic-g3-6

Registration is successful, select [Login now!].

register-and-update-x300-classic-g3-7

Enter your user name and password to login.

Then return to the previous interface and select [Upgrade] to update the software.

register-and-update-x300-classic-g3-8

register-and-update-x300-classic-g3-9

register-and-update-x300-classic-g3-10

Done!

Video guides:

www.obd2shop.co.uk


Sunday, 21 April 2024

OBDSTAR X300 Classic G3 Chery Tiggo 8 Pro Proximity Key Programming

This post will guide you on how to use OBDSTAR X300 Classic G3 to do Chery Tiggo 8 Pro proximity key programming.


The tools we need:

X300 Classic G3

M001 Main Cable

New Key

obdstar-g3-chery-tiggo-8-pro-proximity-key-programming-1

Procedure:

Connect OBDSTAR X300 Classic G3 to the car through M001 Main Cable

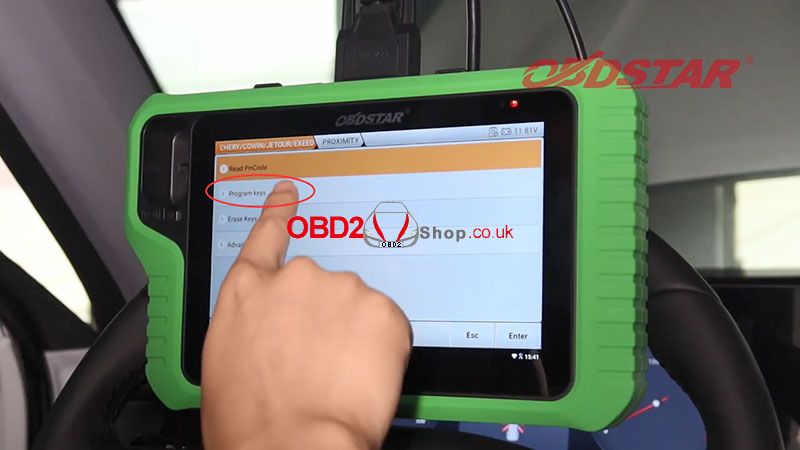
Select [IMMO], enter "Chery" to search, and select [CHERY/COWIN/JETOUR/EXEED]>>[Manual Select Model]>>[TIGGO]>>[TIGGO 8 PRO]>>[PROXIMITY]


Step 1. Read PinCode

Choose [Read PinCode]

obdstar-g3-chery-tiggo-8-pro-proximity-key-programming-2

obdstar-g3-chery-tiggo-8-pro-proximity-key-programming-3

Step 2. Program keys

Choose [Program keys]>>[Program new keys]

obdstar-g3-chery-tiggo-8-pro-proximity-key-programming-4

obdstar-g3-chery-tiggo-8-pro-proximity-key-programming-5

Information:

If it is a blade key please insert it into the keyhole;

If it is a proximity key. Please put the key to be matched in the sensing area and take the other keys out of the vehicle

The sensing area may be located at:

1. Cup holder (some models require moving the cup holder away)

2. Below the cigarette lighter or USB port

3. Near the gear lever


Put the key matched in the sensing area, and input the PinCode just read.

obdstar-g3-chery-tiggo-8-pro-proximity-key-programming-6

obdstar-g3-chery-tiggo-8-pro-proximity-key-programming-7

End of function execution!


The proximity key programming is completed.

obdstar-g3-chery-tiggo-8-pro-proximity-key-programming-8

Video Guides:


www.obd2shop.co.uk

OBDSTAR ECU MASTER FAW Continental SID605 ECU Read & Write Guide

The following guide shows how to read and write the FAW Continental SID605 ECU using the OBDSTAR ECU MASTER . Required Tools Before getting ...